Understanding map size is crucial for planning your raids, choosing loadouts, and deciding whether you have enough time to loot and extract safely. In ARC Raiders, knowing how big each battleground is helps you make smarter tactical decisions from the moment you drop in.
This comprehensive guide breaks down the exact size of every ARC Raiders map, compares them to popular extraction shooters and battle royales, and explains what these dimensions mean for your gameplay experience.
Understanding ARC Raiders Map Structure
ARC Raiders features five full maps in total, plus a practice range where you can test gear without risking your loadout. Each map offers distinct terrain, different levels of verticality, and unique challenges from both ARC machines and other raiders.
Most raids operate on a 30-minute timer, though players can spawn into ongoing matches with as little as 18 minutes remaining. This time pressure directly impacts how much of each map you can realistically explore in a single raid.
The five battlegrounds are Dam Battlegrounds, Buried City, Acerra Spaceport, Blue Gate, and Stella Montis. Each was designed with different gameplay philosophies and spatial layouts.
For detailed tactical positioning across all maps, check out the ARC Raiders Map Callouts Guide to master location names for perfect team communication.
Individual Map Analysis
Dam Battlegrounds: Medium-Sized Industrial Complex
Dam Battlegrounds is the first map most players encounter. It features a balanced design mixing industrial facilities, natural swampland, and the massive dam structure itself.
Estimated Size: Approximately 0.8 to 1.2 square kilometers
Traversal Time: Running from one corner to the opposite corner takes roughly 3 to 4 minutes without stopping for combat or looting. Sprint speed allows you to cover about 250 to 350 meters per minute depending on terrain.
Design Philosophy: Dam was built to teach new players the core mechanics. The map funnels action toward the center around Control Tower and Water Treatment, creating natural PvP hotspots while offering quieter outer zones for safer looting.
Key Distances:
- Spawn points to Control Tower: 200 to 500 meters depending on location
- Hydroponic Dome Complex to South Swamp extraction: approximately 400 meters
- Dam Complex end to end: roughly 600 meters
The moderate size means you can hit multiple loot zones in one raid if you move efficiently. A typical Dam run involves hitting 2 to 4 major POIs before extraction.
Buried City: Dense Urban Environment
Buried City trades open space for vertical density. This sand-covered urban map packs numerous buildings, alleyways, and multi-story structures into a relatively compact area.
Estimated Size: Approximately 0.7 to 1.0 square kilometers
Traversal Time: Corner to corner movement takes about 2.5 to 3.5 minutes of continuous running. However, the maze-like streets and building interiors significantly increase actual travel time when navigating between landmarks.
Design Philosophy: Buried City emphasizes close-quarters combat and stealth gameplay. The tight corridors and numerous buildings create a labyrinth where sound and positioning matter more than long-range sightlines.
Key Distances:
- Plaza Rosa to Red Tower: approximately 250 meters
- Hospital to Space Travel Building: roughly 200 meters
- West Village Houses to Plaza Rosa: about 350 meters
Despite being one of the smaller maps by total area, Buried City often feels larger because vertical movement through multi-story buildings adds significant time. Exploring a single building like the Hospital or Space Travel Building can consume 3 to 5 minutes alone.
The dense urban layout means you will encounter more buildings per square meter than any other map. This concentration of loot spots makes Buried City excellent for maximizing value in short raids.
Acerra Spaceport: Vertical Industrial Giant
Spaceport introduces extreme verticality with its launch towers, industrial buildings, and multi-level structures. This is one of the largest feeling maps in ARC Raiders.
Estimated Size: Approximately 1.2 to 1.6 square kilometers
Traversal Time: Running from corner to corner takes 4 to 5 minutes minimum. Adding vertical movement via ziplines and stairs can easily add another 1 to 2 minutes.
Design Philosophy: Spaceport rewards players who master vertical combat and zipline navigation. The map offers the highest concentration of epic-tier loot but demands excellent spatial awareness across multiple elevation levels.
Key Distances:
- Launch Towers to Departure Building: approximately 400 meters
- Control Tower A6 to Container Storage: roughly 300 meters
- Fuel Lines to Vehicle Maintenance: about 200 meters
- Launch Tower base to top: approximately 50 to 70 meters vertical distance
The combination of horizontal spread and vertical height makes Spaceport the most time-consuming map to fully explore. Each map takes 2 to 4 hours to fully explore and complete associated quests, and Spaceport typically falls on the higher end of that range.
Zipline travel is faster than ground movement but exposes you to long-range threats. Coordinating multi-level approaches with your squad can compress exploration time significantly.
Blue Gate: Wide-Open Wilderness
Blue Gate stands out as the most expansive surface map with vast open spaces, mountainous terrain, and underground bunker complexes.
Estimated Size: Approximately 1.4 to 1.8 square kilometers including underground sections
Traversal Time: Surface traversal from corner to corner takes 4.5 to 6 minutes of continuous running across the open wilderness. Underground bunker navigation adds separate travel time.
Design Philosophy: Blue Gate combines long-range outdoor combat with tight underground CQB. The map punishes poor positioning in open areas while rewarding players who use terrain and underground passages strategically.
Key Distances:
- Reinforced Reception to Ancient Fort: approximately 500 meters
- Village to Pilgrim’s Peak: roughly 450 meters
- Surface to deepest bunker level: about 30 to 40 meters vertical depth
- Highway Collapse to Central Bunker entrance: approximately 350 meters
With random spawn locations and extended travel time for searching, PvP and PvE fighting, spawning 10+ minutes into a map can remove the possibility of finding good loot as prime locations have already been picked clean.
Blue Gate’s size makes spawn timing critical. Early spawns (28 to 30 minutes remaining) give you time to cross the map safely. Late spawns (under 20 minutes) often force you to loot nearby areas and extract quickly.
Stella Montis: Underground Mountain Facility
Stella Montis is unique as a primarily underground map carved into a mountain. The facility layout creates a completely different spatial experience.
Estimated Size: Approximately 0.6 to 0.9 square kilometers of explorable facility space
Traversal Time: End-to-end travel through the facility takes about 2 to 3 minutes of running through corridors. However, multiple levels, dead ends, and maze-like passages increase actual navigation time significantly.
Design Philosophy: Stella Montis creates claustrophobic tension with tight corridors, multiple vertical levels, and limited sightlines. The underground setting eliminates long-range combat entirely.
Key Distances:
- Lobby to Assembly Workshops: approximately 200 meters through corridors
- Medical Research to Loading Bay: roughly 180 meters
- Security Checkpoint ground floor to top floor: about 20 meters vertical
- Main entrance to deepest sections: approximately 150 meters linear distance but 250+ meters actual travel through passages
The enclosed environment makes sound propagation extremely important. Metal floors carry footsteps far, and a firefight in one section can be heard throughout much of the facility.
Despite being one of the smaller maps by square footage, Stella Montis often feels larger because the maze-like layout forces indirect routes between locations.
Comparison with Other Extraction Shooters
How does ARC Raiders stack up against the competition? Here is how map sizes compare across popular extraction shooters.
Escape from Tarkov
Tarkov features multiple maps ranging from tiny to massive:
- Factory: Approximately 0.15 square kilometers (smallest Tarkov map)
- Labs: Approximately 0.2 square kilometers
- Customs: Approximately 0.6 square kilometers
- Interchange: Approximately 0.7 square kilometers
- Reserve: Approximately 0.9 square kilometers
- Woods: Approximately 1.5 square kilometers
- Shoreline: Approximately 2.0 square kilometers
- Lighthouse: Approximately 2.2 square kilometers
- Streets of Tarkov: Approximately 1.8 square kilometers
Comparison: ARC Raiders maps (0.6 to 1.8 square kilometers) fall into the middle range of Tarkov’s map sizes. Dam Battlegrounds and Buried City are comparable to Customs and Interchange, while Blue Gate rivals Woods and approaches Shoreline’s scale.
The key difference is verticality. ARC Raiders emphasizes multi-level combat more than most Tarkov maps, especially in Spaceport and Stella Montis.
Hunt: Showdown
Hunt Showdown features four maps, each measuring 1000 meters by 1000 meters (1 square kilometer):
- Stillwater Bayou: 1 square kilometer
- Lawson Delta: 1 square kilometer
- DeSalle: 1 square kilometer
- Mammon’s Gulch: 1 square kilometer
Traversal time running across Hunt maps takes approximately 13 minutes, while sprinting across takes about 8 minutes.
Comparison: Most ARC Raiders maps are similar in size to Hunt’s standard 1 square kilometer battlegrounds. However, ARC Raiders’ 30-minute timer creates more urgency than Hunt’s longer match duration, making the maps feel larger relative to available time.
Hunt focuses on horizontal spread with less vertical complexity than Spaceport or Stella Montis. ARC Raiders compensates for sometimes smaller horizontal space by adding significant vertical gameplay.
Gray Zone Warfare
Gray Zone Warfare features a massive open-world approach:
- Main Map: Approximately 42 square kilometers total area
- Populated Areas of Interest (AOI): Individual zones around 1 square kilometer each
Comparison: Gray Zone Warfare’s total playable area dwarfs ARC Raiders entirely. However, Gray Zone spreads its 48 players and AI across that enormous space, creating very different player density and encounter rates.
ARC Raiders concentrates action into smaller battlegrounds with higher player density per square meter, creating more consistent combat encounters.
Map Size and Player Count Dynamics
Understanding how player count affects your experience across different map sizes is crucial for planning raids.
You can play solo or in groups of up to three, and the total number of players on each map varies.
For detailed information about how many players populate each battleground, visit the ARC Raiders Player Count Per Map guide.
Player Density Calculations
Let’s calculate approximate player density for each map assuming maximum capacity:
Dam Battlegrounds (1.0 sq km, ~12 to 18 players):
- Player density: 12 to 18 players per square kilometer
- Average space per player: 55,000 to 83,000 square meters
Buried City (0.85 sq km, ~12 to 18 players):
- Player density: 14 to 21 players per square kilometer
- Average space per player: 47,000 to 71,000 square meters
Spaceport (1.4 sq km, ~15 to 21 players):
- Player density: 11 to 15 players per square kilometer
- Average space per player: 67,000 to 93,000 square meters
Blue Gate (1.6 sq km, ~12 to 18 players):
- Player density: 7.5 to 11 players per square kilometer
- Average space per player: 89,000 to 133,000 square meters
Stella Montis (0.75 sq km, ~12 to 18 players):
- Player density: 16 to 24 players per square kilometer
- Average space per player: 42,000 to 63,000 square meters
These calculations show that Stella Montis and Buried City have the highest player density, creating more frequent encounters. Blue Gate offers the most space per player, allowing for stealthier approaches and safer looting routes.
Exploration Time Analysis
How long does it actually take to explore each map? Here is what practical testing reveals.
Speed Looting (10 to 15 Minutes)
Hitting 1 to 2 major POIs, grabbing key loot, and extracting quickly:
- Dam Battlegrounds: Hydroponic Dome to South Swamp (12 minutes)
- Buried City: West Village Houses to Red Tower (10 minutes)
- Spaceport: Vehicle Maintenance to nearest extraction (13 minutes)
- Blue Gate: Village to closest extraction (15 minutes)
- Stella Montis: Lobby to nearest extraction (11 minutes)
Standard Raid (15 to 25 Minutes)
Exploring 3 to 4 major POIs with moderate combat:
- Dam Battlegrounds: Control Tower → Research Building → Water Treatment → Extraction (20 minutes)
- Buried City: Plaza Rosa → Hospital → Space Travel Building → Extraction (18 minutes)
- Spaceport: Launch Towers → Departure Building → Container Storage → Extraction (23 minutes)
- Blue Gate: Central Bunker → Ancient Fort → Extraction (22 minutes)
- Stella Montis: Medical Research → Assembly Workshops → Loading Bay → Extraction (19 minutes)
Full Exploration (25 to 30 Minutes)
Attempting to hit every major loot zone:
- Dam Battlegrounds: Rarely achievable in 30 minutes with combat
- Buried City: Possible but requires perfect routing
- Spaceport: Nearly impossible in one raid
- Blue Gate: Requires skipping underground sections
- Stella Montis: Achievable but leaves no room for extended combat
The 30-minute timer forces meaningful decisions about which zones to prioritize. Greed often leads to failed extractions when the timer expires.
Vertical Complexity Adds “Hidden Size”
Traditional square kilometer measurements do not capture the full scope of multi-level maps. When you factor in vertical space, some maps feel much larger.
Spaceport Vertical Analysis
Launch Towers add approximately 50 to 70 meters of vertical space. If you calculate the explorable volume including multiple tower levels, container stacks, and building floors, Spaceport’s total explorable space increases dramatically.
Assuming average 3 to 4 story buildings across 40% of the map area adds roughly 0.5 to 0.7 square kilometers of additional floor space across multiple levels.
Effective Explorable Space: 1.2 sq km ground level + 0.6 sq km additional floors = 1.8 sq km total floor area
This makes Spaceport feel comparable to a 1.8 square kilometer single-level map in terms of content density.
Stella Montis Volume Calculations
As an underground facility with 3 to 5 distinct levels in many sections, Stella Montis multiplies its ground footprint significantly.
Effective Explorable Space: 0.75 sq km base area × 3 average levels = 2.25 sq km equivalent floor space
This explains why Stella Montis, despite having the smallest ground footprint, often takes as long to fully explore as larger maps.
Buried City Building Density
With dozens of multi-story buildings, Buried City also benefits from vertical expansion.
Effective Explorable Space: 0.85 sq km ground level + 0.4 sq km building interiors = 1.25 sq km total floor area
The dense urban environment creates more explorable space per square kilometer than any other surface map.
Practical Implications for Gameplay
What do these map sizes mean for how you actually play ARC Raiders?
Loadout Selection Based on Map Size
Small to Medium Maps (Dam, Buried City, Stella Montis):
- Prioritize close to medium-range weapons
- Bring lightweight loadouts for faster movement between POIs
- Pack breaching tools as high-value rooms are common
- Consider stealthy approaches due to high player density
Large Maps (Spaceport, Blue Gate):
- Include at least one medium to long-range weapon
- Bring stamina management items for extended running
- Pack medical supplies for longer engagements far from extraction
- Consider extraction location when choosing spawn-side routes
Time Management Strategies
The 30-minute timer creates different pressures on different maps:
Efficient Routes (All Maps):
- Plan your path before spawning
- Mark 2 to 3 priority POIs maximum
- Always know your closest extraction point
- Cut losses and extract early if timer drops below 10 minutes
Late Spawns (<20 Minutes Remaining):
- Avoid central high-traffic zones that are likely looted
- Hit outer POIs that most players skip
- Move directly toward nearest extraction after 1 to 2 loot stops
- Consider free loadouts to minimize risk
Early Spawns (>25 Minutes Remaining):
- Contest high-value central zones
- Take time to clear ARC enemies for materials
- Engage in PvP if you have loadout advantage
- Explore secondary areas if primary zones are hot
Squad Coordination Across Map Sizes
Larger maps demand different squad communication:
Small Maps (Stella Montis, Buried City):
- Stay within 50 to 100 meters of teammates
- Use detailed building callouts (floor numbers, room names)
- Coordinate simultaneous breaches on different loot rooms
- React quickly to combat sounds since encounters are close
Large Maps (Blue Gate, Spaceport):
- Spread up to 150 to 200 meters for coverage
- Use compass bearings and distance callouts
- Assign roles (scout, support, rear guard) for movement
- Plan rally points before splitting up
For comprehensive location callouts across all map sizes, the ARC Raiders Map Callouts Guide provides detailed communication strategies.
Dynamic Events and Effective Map Size
ARC Raiders ties its biggest encounters and loot spikes to real-world time through named conditions and boss-style events on a fixed schedule.
Events like Matriarch, Harvester, Hidden Bunker, and Night Raid can dramatically change how large a map feels by concentrating players in specific zones.
Event Impact on Map Flow
Night Raid:
- Reduces effective visibility to 50 to 100 meters
- Makes large maps like Blue Gate feel smaller since long sightlines vanish
- Increases importance of close-range positioning
Harvester/Matriarch Events:
- Concentrates players toward boss location
- Creates temporary “hot zones” of 200 to 300 meter radius
- Makes rest of map feel emptier and safer
Hidden Bunker (Spaceport):
- Gives players a 40-minute timer to activate four antennas and access the bunker
- Extends effective raid time beyond normal 30-minute limit
- Focuses action underground, leaving surface areas quiet
These events effectively shrink or expand maps by changing where players concentrate their activity.
Weather and Visibility Effects on Perceived Size
Dynamic Weather and Time of Day keep gameplay fresh, but they also change how large maps feel.
Fog Conditions
Heavy fog reduces visibility to 50 to 150 meters depending on density. This makes large open maps like Blue Gate feel claustrophobic since you cannot see distant landmarks for navigation.
Players stick to closer routes and avoid crossing open areas, effectively reducing the usable map area.
Electromagnetic Storms
Visual interference and reduced electronic functionality push players toward direct visual sightlines. Long-range engagements become harder, making large maps play smaller.
Night Conditions
Darkness limits visibility even more dramatically than fog. Players rely on landmarks they can see clearly, which concentrates movement along well-lit or recognizable routes.
Blue Gate’s 1.6 square kilometers might as well be 0.8 square kilometers at night since half the map becomes nearly unusable for safe navigation.
Movement Speed and Map Size Relationship
Your actual movement speed directly impacts how large maps feel:
Base Sprint Speed: Approximately 5 to 6 meters per second Combat Movement: Approximately 3 to 4 meters per second
Crouch Walk: Approximately 1.5 to 2 meters per second Zipline Travel: Approximately 8 to 10 meters per second
Time to Cross 500 Meters:
- Sprinting: 90 to 100 seconds
- Combat movement: 125 to 165 seconds
- Crouch walking: 250 to 330 seconds
- Zipline (where available): 50 to 65 seconds
This explains why Spaceport feels more manageable despite its size—ziplines cut travel time by 40% compared to ground movement.
Conversely, Stella Montis feels larger than its footprint because there are no fast-travel options and corridors force indirect routes.
Solo vs Squad Map Size Experience
Map size affects solo players and squads very differently.
Solo Players
Advantages on Large Maps:
- More hiding spots and alternative routes
- Easier to avoid squad firefights
- Can use stealth more effectively across open spaces
Disadvantages on Large Maps:
- Longer travel times without squad support
- Harder to defend against squad rushes in open terrain
- Less map coverage for spotting threats
Best Solo Maps: Blue Gate, Spaceport (using outer routes)
Squads
Advantages on Large Maps:
- Can split up to cover more territory
- Better at controlling key zones with crossfire positions
- Easier extraction security with 360-degree coverage
Disadvantages on Large Maps:
- Harder to keep squad together across vast distances
- More communication needed for coordination
- Squad positioning errors are harder to recover from
Best Squad Maps: Dam Battlegrounds, Spaceport (vertical teamwork)
Map Size Evolution and Future Updates
Stella Montis arrived in November 2025 as part of the Northline update, showing that Embark Studios continues expanding the game world.
Future maps might explore different size philosophies:
- Larger open-world style maps (2+ square kilometers)
- Smaller focused combat zones (0.4 to 0.6 square kilometers)
- Multi-map connected experiences
- Procedurally varied layouts within fixed boundaries
The current 0.6 to 1.8 square kilometer range provides good variety while maintaining the focused extraction shooter experience.
Comparing Map Sizes to Other Game Genres
To give perspective for players coming from other genres:
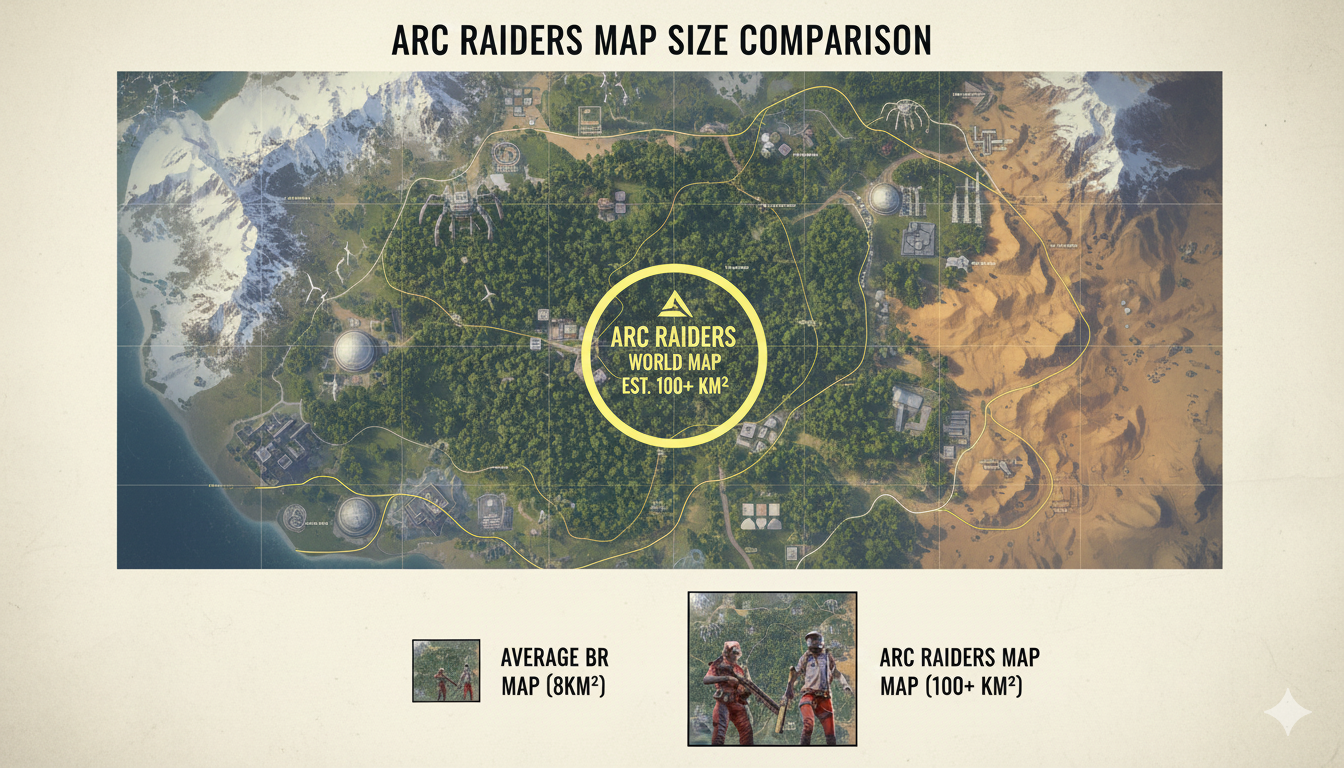
Battle Royale Comparisons
- Fortnite Map: Approximately 5.5 square kilometers
- PUBG Erangel: Approximately 64 square kilometers
- Apex Legends: Approximately 5 to 6 square kilometers per map
- Warzone (Verdansk): Approximately 9 square kilometers
ARC Raiders maps are 10% to 30% the size of standard battle royale maps but with much higher player density and 30-minute time limits instead of gradually shrinking zones.
Open World Comparisons
- GTA V Map: Approximately 127 square kilometers
- Skyrim: Approximately 37 square kilometers
- The Witcher 3: Approximately 136 square kilometers
ARC Raiders offers focused extraction gameplay rather than open-world exploration. Each map is densely packed with content instead of spreading encounters across vast empty spaces.
Competitive Shooter Comparisons
- Counter-Strike Maps: 0.01 to 0.03 square kilometers
- Call of Duty Maps: 0.02 to 0.08 square kilometers
- Battlefield Maps: 0.5 to 4 square kilometers
ARC Raiders falls between competitive arena shooters and large-scale Battlefield maps, creating a unique middle ground for extraction gameplay.
Conclusion: The Right Size for Extraction Gameplay
ARC Raiders’ map sizes (0.6 to 1.8 square kilometers) hit a sweet spot for extraction shooter gameplay. They are large enough to support meaningful tactical decisions, diverse playstyles, and varied engagement ranges, yet small enough that 30-minute raids feel complete rather than rushed.
Key Takeaways:
- Dam Battlegrounds (1.0 sq km) offers balanced introduction gameplay with moderate travel times
- Buried City (0.85 sq km) maximizes content density through vertical urban design
- Spaceport (1.4 sq km) provides the largest horizontal spread with extreme verticality
- Blue Gate (1.6 sq km) offers the most surface area for long-range outdoor combat
- Stella Montis (0.75 sq km) multiplies its small footprint through multi-level facility design
Compared to competitors like Tarkov and Hunt: Showdown, ARC Raiders sits comfortably in the medium-sized extraction map category. The 30-minute timer creates urgency that makes even large maps feel appropriately sized.
Understanding these dimensions helps you plan better routes, choose appropriate loadouts, and make smarter tactical decisions from spawn to extraction.
For interactive maps showing every location, extraction point, and tactical position across all battlegrounds, visit ARC Raiders Interactive Maps to enhance your navigation and awareness.
Now that you know exactly how big each map is, use that knowledge to plan smarter raids, avoid getting caught by the timer, and extract with the best loot every time.
Good luck out there, Raiders!